
ComfyUI is one of the AI image generation tools, known for its fast and lightweight performance, attracting many users. In this article, we will guide you step-by-step on how to install and use ComfyUI, making it easy even for beginners to follow along.
Installation Process
Installing ComfyUI is very straightforward. Follow these steps:
- Visit GitHub Repository: Access the ComfyUI GitHub.
- Download Files: Click the Direct link to download to download the files.
- Extract Files: Extract the downloaded files to your desired folder.
The installation is now complete! Let’s move on to the next step.
Configuration Process
After installation, a few basic settings are required. If you’ve used AUTOMATIC1111 before, you’ll find configuring ComfyUI to be straightforward.
Sharing Model Files
To share model files from AUTOMATIC1111, edit the `extra_model_paths.yaml.example` file by modifying the `base_path` and saving it as `extra_model_paths.yaml`.
a111:
     base_path: F:/sd/stable-diffusion-webui
     checkpoints: models/Stable-diffusion
     configs: models/Stable-diffusion
     vae: models/VAE
     loras: |
          models/Lora
          models/LyCORIS
     upscale_models: |
                   models/ESRGAN
                   models/RealESRGAN
                   models/SwinIR
     embeddings: embeddings
     hypernetworks: models/hypernetworks
     controlnet: models/ControlNet
This configuration allows you to use the model files from AUTOMATIC1111 in ComfyUI.
Running ComfyUI
Now let’s run ComfyUI.
Update
Run the `update_comfyui.bat` file located in the `ComfyUI_windows_portable\update` folder to update to the latest version.
Execution

- If you have an Nvidia GPU, run the `run_nvidia_gpu.bat` file.
- Otherwise, run the `run_cpu.bat` file.

After a short wait, ComfyUI will start, and the main screen will appear in your web browser.
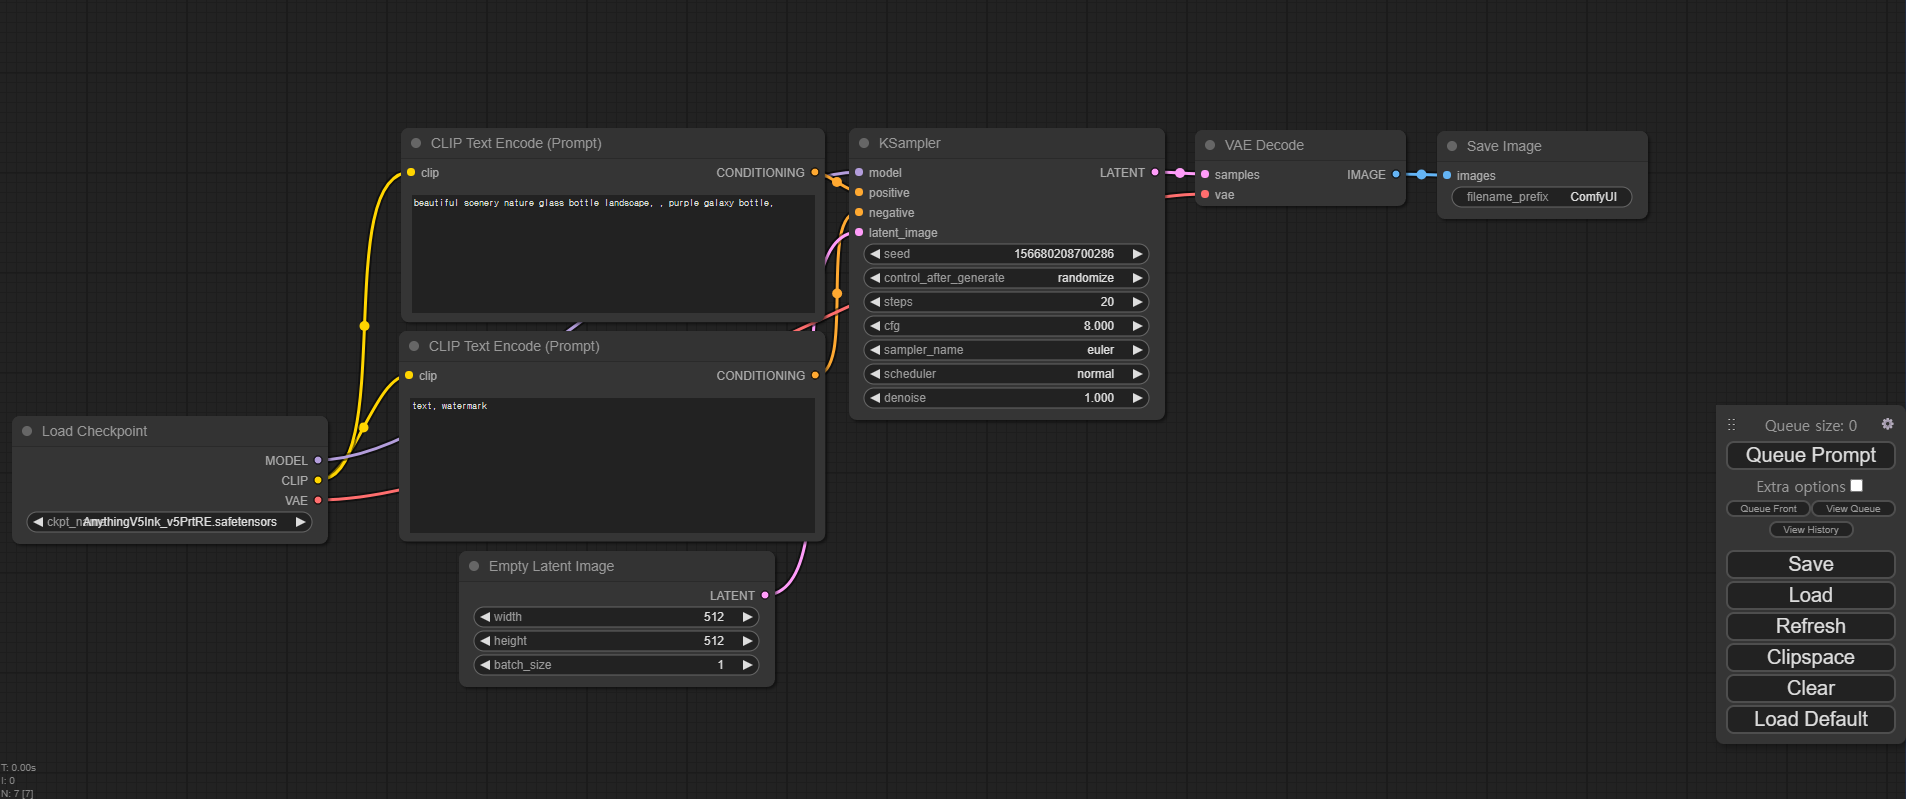
Basic Usage
On ComfyUI’s main screen, you can create images using various nodes. The basic workflow consists of the following steps:
- Select Model: Choose the model from the top-left corner.
- Enter Prompt: Input the text prompt and negative prompt.
- Set Image Size: Set the image size in the `Empty Latent Image` node.
- Configure Sampler: Adjust the sample steps, CFG scale, etc.
- VAE Decoder: The VAE decoder processes the output from the sampler to generate the final image.
Each node can be easily connected by clicking and dragging, and you can use the [Load] and [Save] features to save and load workflows.
Advanced Usage
One of ComfyUI’s true strengths is the ability to use workflows created by others.
- Import Workflow: Drag and drop a `.json` file downloaded from the internet or an image generated by ComfyUI onto the screen, and the workflow will be automatically loaded.
- Add Node: Right-click on the desktop and select the `Add Node` menu to add various nodes.
For example, to add a VAE node, select `Add Node -> loaders -> Load VAE`. Then, connect the added VAE node to the appropriate location.
Conclusion
ComfyUI is a fast and flexible AI image generation tool, with the significant advantage of easily sharing and using various workflows. Now that you have installed and configured ComfyUI, try creating stunning images using different workflows. If you enjoyed this guide, be sure to check out other ComfyUI tutorials as well.